How to Make an Indoor Pompom Wreath
12 Dec 2016
Today, I am very excited to say that we’ve got a guest post for you by the very lovely award winning blogger, Melanie from Melanie Lissack Interiors. We had the pleasure of meeting Melanie at the Amara Interior Blog Awards this year, where she very deservedly won her category for ‘Best Craft & DIY Blog’. In the run up to Christmas we knew we’d be rather very busy, so we thought we’d enlist her help and asked Melanie to come up with a gorgeous craft post that our readers would love. And what a gorgeous post it is indeed! Melanie came up with a seriously stunning and colorful indoor pompom wreath and has provided step by step instructions for you to make this at home. So, take it away, Melanie…
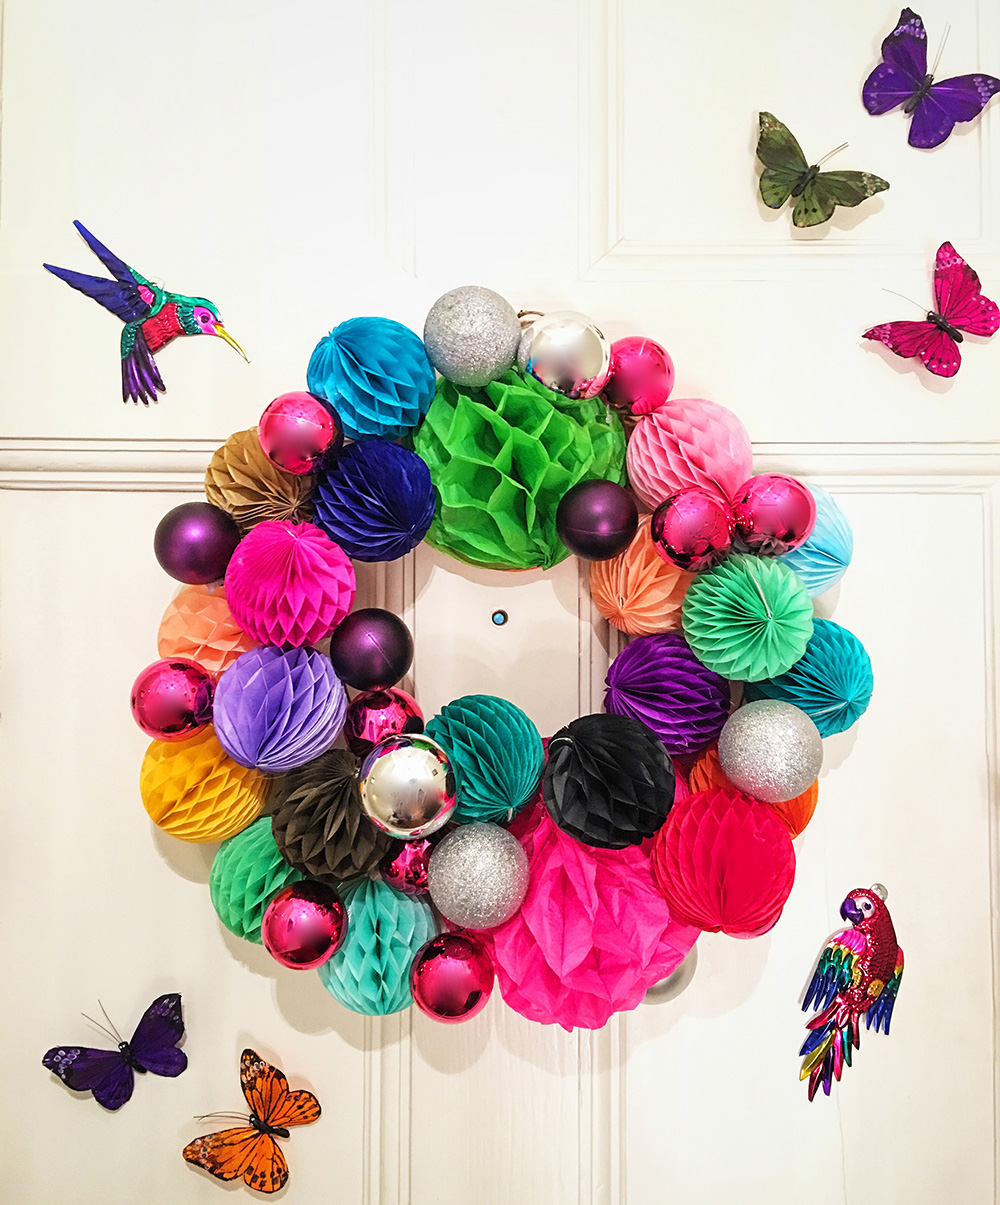
If you would rather have a more colourful Christmas than a traditional one, then this bright honeycomb pompom indoor wreath might just be for you! I have a traditional door wreath on the exterior of my front door made with berries and holly, but DIY’d this pompom wreath for the inside of the door ready for Xmas and New Year parties!

I have to fess up – I made some of the honeycomb pompoms on this wreath, but the smaller ones were bought (you can get around 20 mini pompoms for £6 online). If you have a group of kids that need to be entertained, or if you find you really enjoy honeycomb pompom making, then you can make all the pompoms. However, if like me you are a bit pushed for time and your kid showed absolutely no interest in making any pompoms for you, then feel free to cheat a bit!
To make a paper honeycomb pompom wreath you’ll need the following (and some pre-made pompoms if you are cheating, plus some cheap baubles if you want an extra glam touch):
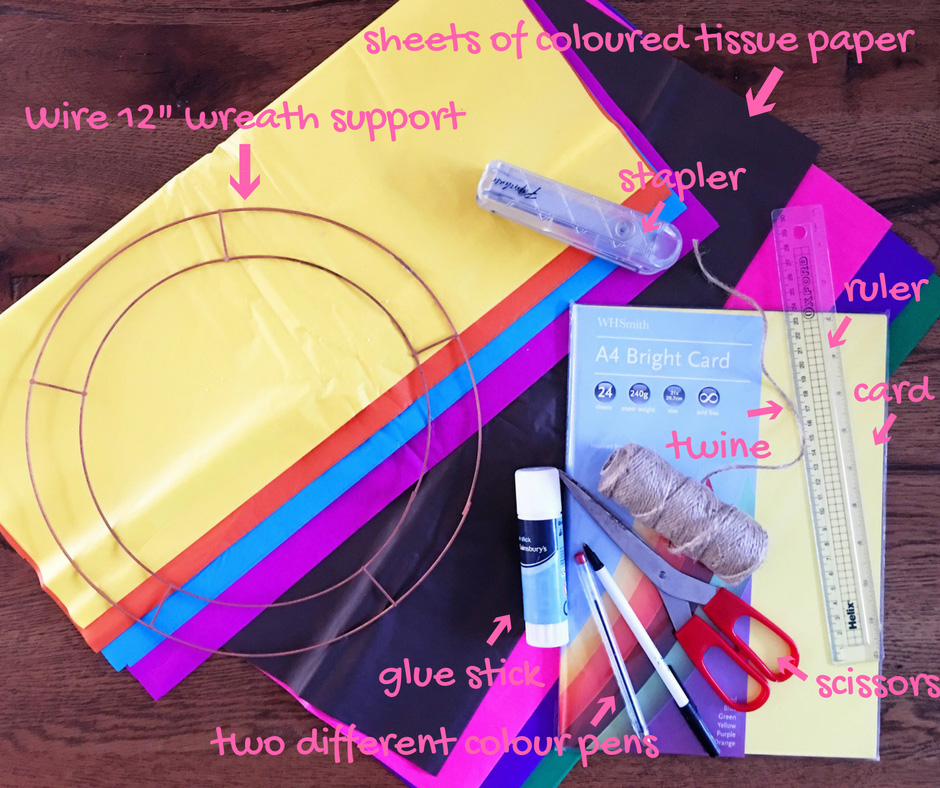
You can buy the 12″ wire wreath support at craft stores for a couple of pounds. This is what you will tie your pompoms to.
To make the pompoms follow these simple steps!
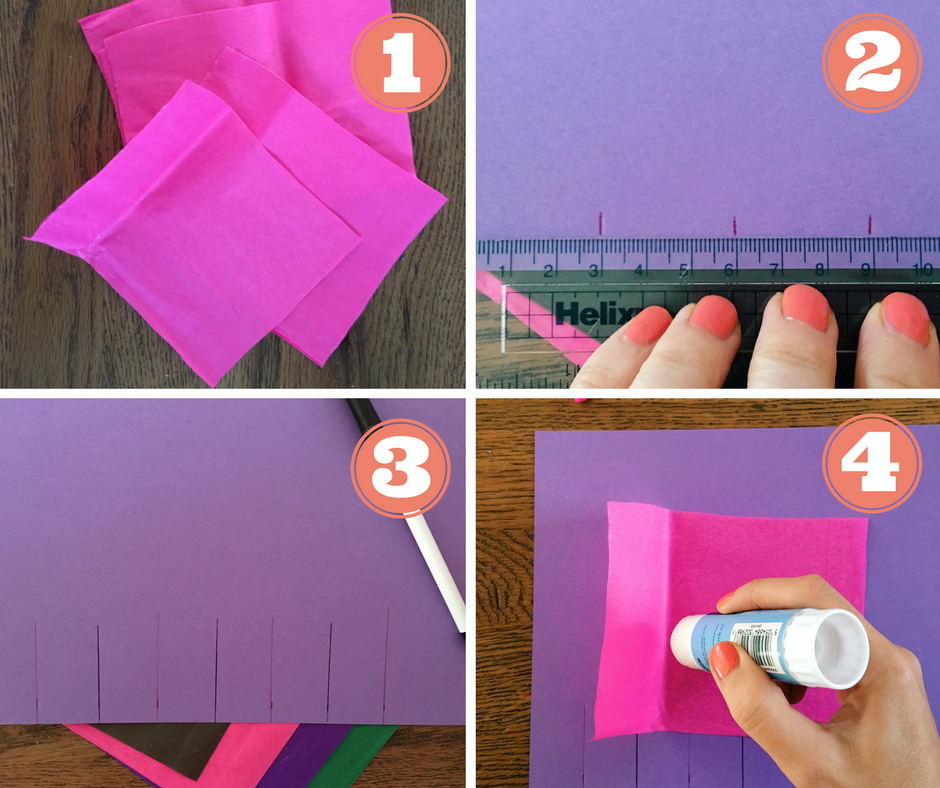
1. Fold over a sheet of tissue paper numerous times to make a number of squares around 17cmx17cm in size. Cut along the edges to make single sheets. You’ll need about 45 single cut sheets to make a full round pompom.
2. Take a piece of card and along the bottom measure out 3cm gaps.
3. Alternate two colour pens to make marking points on the bottom of the card.
4. Using a pritt stick, glue one side of the tissue paper pieces.
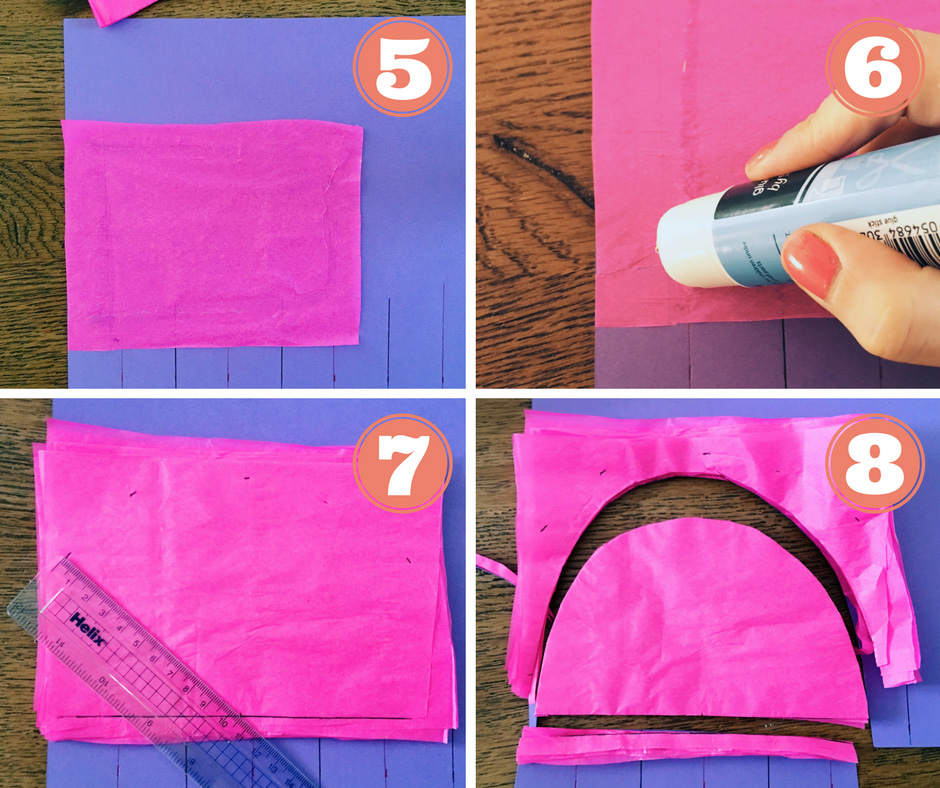
5. Stick down this first tissue paper piece just above the marking points.
6. Using your glue stick, glue a line down one colour of the marking lines only. Stick another piece of tissue paper down on top of this one, then glue down the lines of the other line colour, stick down another tissue paper piece, then repeat!
7. Once you have stuck down all your tissue paper pieces, take your ruler and mark a semi circle on the top sheet. Draw a base-line, mark out the middle of the line, then use your ruler like a clock hand to mark the semi-circle.
8. Cut out your semi-circle with scissors.
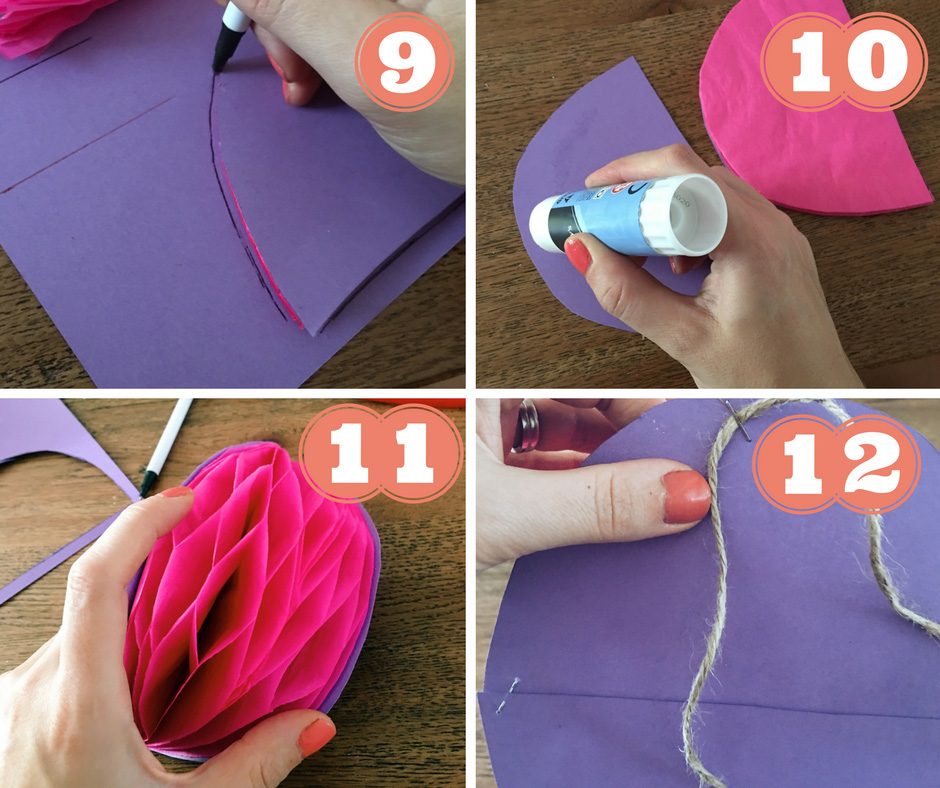
9. Place your semi-circle on the bit of card that remains unused and draw around it.
10. Cut out the outlined shape then stick it on the other side of the tissue paper.
11. Gently unfold your pompom. You can make a circle, or if your pompom is quite large only half open it and staple the card together (you want your door wreath to be able to rest against the door).
12. Staple some twine to the card ready to attach to the wire support.
Using some twine, hang your wire support up somewhere (I used the fridge handle!) and tie your pompoms to the wire support. Build up the pompoms as you go. Using a hot glue gun or some superglue, give the pompoms extra support on top of each other if required so they stay in place.
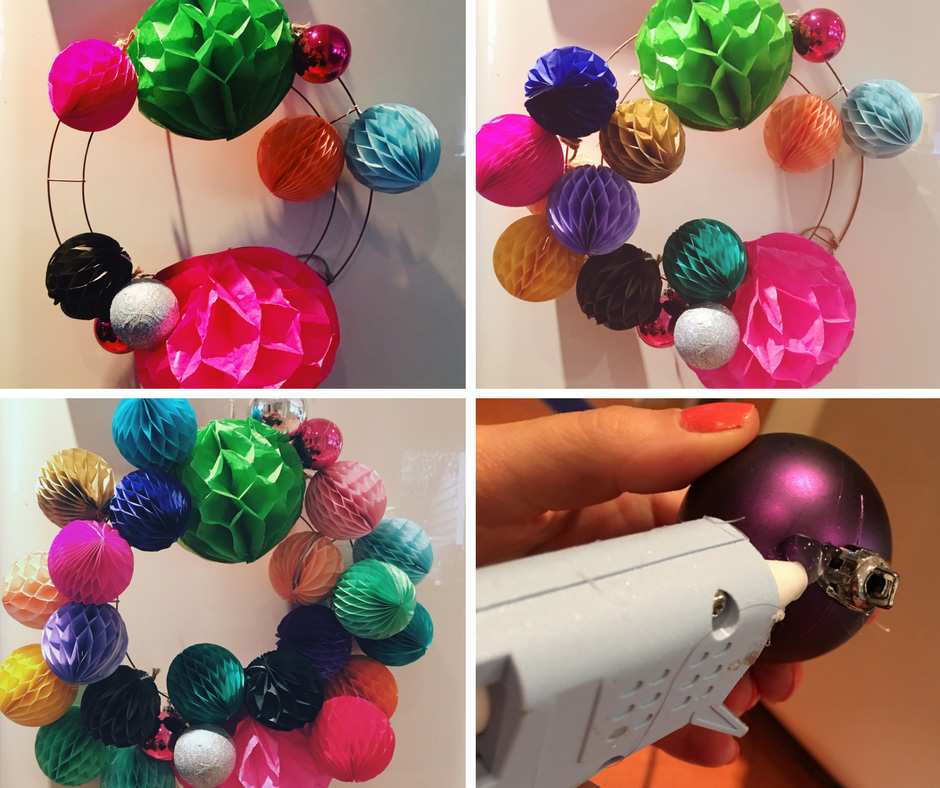
Once your pompoms are up, glue in some cheap baubles to give the wreath more shape if needed and an extra glam touch. Just add glue to the top of the baubles and stick them on/in the paper pompoms.

TA-DA! One modern, colourful door wreath can then be hung in your home.
So, what do you think? Pretty special isn’t it. HUGE thank you to Melanie for providing this post for us. If you make this wreath or your own version of it at home, do post a pic and tag us both on Instagram: @audenzahome and @melanielissackinteriors– we’d love to see how they turn out!
For lots of Christmas crafting and DIY ideas, head over to her blog: Melanie Lissack Interiors.
Hollie x
All images and content graciously supplied by Melanie Lissack Interiors.
Leave a comment
Your comments make us happy!


